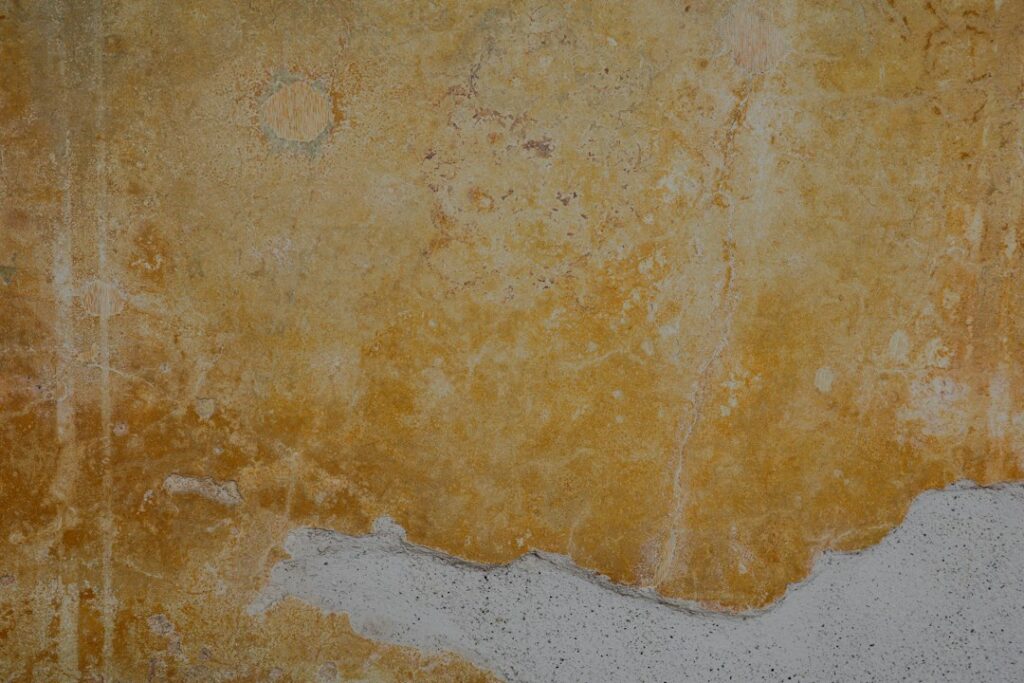
Peeling paint is rarely just a paint problem. The loose coating is usually a symptom of something underneath it: moisture, poor surface preparation, incompatible coatings, excessive humidity, a dirty or glossy substrate, aging paint, or movement in the material below.
The most expensive mistake is to scrape the loose edges, cover the area with fresh paint, and assume the job is finished. If the cause is still active, the new paint can blister, crack, or peel again. In older U.S. homes, aggressive sanding can also create a separate hazard if lead-based paint may be present.
This 2026 guide explains how to diagnose peeling paint before repainting, how to separate a cosmetic coating failure from a moisture problem, when a homeowner can reasonably handle the repair, and when lead, mold, water intrusion, or building damage should move the project to a professional.
Quick Decision Guide
| What you see | Likely direction | First action |
|---|---|---|
| Small isolated peeling area on a dry wall | Adhesion or preparation problem | Check surface condition, then repair and repaint |
| Peeling near a shower, tub, sink, or laundry area | Humidity or water exposure | Find and control the moisture source first |
| Peeling below a roof line or ceiling stain | Possible roof or flashing leak | Investigate the leak before painting |
| Paint bubbling on a basement wall | Moisture moving through masonry | Check drainage, seepage, and wall moisture |
| Peeling around windows | Condensation, failed caulk, water entry, or friction | Inspect the window assembly and moisture pattern |
| Pre-1978 home with unknown paint history | Possible lead-based paint | Use lead-safe planning before disturbing paint |
| Peeling plus soft drywall, rot, mold, or recurring stains | Underlying building problem | Repair the source and damaged material before repainting |
Why Paint Peels
Paint adheres best when the surface is clean, dry, sound, and compatible with the coating system. If any of those conditions are missing, the bond can fail between the new paint and the old paint, between the old paint and the primer, or between the entire coating system and the wall itself.
The pattern often gives useful clues. Paint that lifts in sheets can point toward poor adhesion. Small bubbles may suggest trapped moisture or contamination. Peeling concentrated around windows, bathrooms, exterior walls, or ceilings deserves more attention because water or condensation may be involved.
Do not diagnose the cause from appearance alone. Look at where the failure occurs, what is behind that surface, whether the area gets wet or humid, how old the coating is, and whether the problem returns after repainting.
Cause 1: Moisture Behind or Under the Paint
Moisture is one of the most important causes to rule out because repainting over a wet substrate can hide the symptom temporarily without fixing the building problem.
Possible moisture sources include:
- Plumbing leaks inside a wall or ceiling
- Roof or flashing leaks
- Window or door water intrusion
- Condensation on cold surfaces
- High bathroom or laundry humidity
- Basement seepage
- Exterior drainage problems
- Air-conditioning condensate or drain issues
The U.S. Environmental Protection Agency emphasizes that moisture control is the key to mold control. EPA guidance says water-damaged or damp areas should be dried quickly and that indoor humidity should generally be kept below 60 percent when possible. Painting over a moldy or persistently damp surface is not a repair; EPA specifically warns that paint applied over moldy surfaces is likely to peel.
If the failure is in a bathroom, also review our bathroom ventilation guide. Poor exhaust, undersized fans, long run times after showers, or a blocked duct can keep wall and ceiling surfaces damp enough to shorten paint life.
How to Tell Whether Moisture Is Involved
You do not need specialized equipment to notice some warning signs. Look for a pattern rather than one clue:
- Yellow or brown staining
- Soft, swollen, or crumbly drywall
- Musty odor
- Visible mold or mildew
- Peeling that returns in the same spot
- Condensation on windows or walls
- Efflorescence or white mineral deposits on masonry
- Paint bubbling after heavy rain
- Damage directly below plumbing fixtures or roof penetrations
A pin-type or pinless moisture meter can be useful for comparison, but homeowners should not treat one reading as a complete diagnosis. Different materials and meter designs behave differently. The goal is to determine whether the surface is staying abnormally damp and, if so, why.
Cause 2: Poor Surface Preparation
Even excellent paint can fail on a bad substrate. Common preparation mistakes include painting over dust, grease, soap residue, glossy old paint, loose chalky coating, wallpaper adhesive, or a surface that was not allowed to dry after cleaning.
Kitchens are especially prone to invisible grease films. Bathrooms may have soap residue or aerosol products on walls. Trim can be too glossy for a new coating to bond well without proper cleaning and deglossing.
If the failure is limited to the most recent coat and the surface underneath is sound and dry, preparation may be the main issue. The correct repair usually means removing only the unsound coating, feathering edges, cleaning thoroughly, using the correct primer where needed, and repainting according to the coating manufacturer’s instructions.
Cause 3: Incompatible Paint Systems
Not every coating bonds equally well to every existing finish. Problems can occur when a new water-based coating is applied over a very glossy or poorly prepared older oil-based surface, when a stain-blocking primer is omitted where one is needed, or when a specialty substrate is coated with the wrong product.
Before repainting, identify what you reasonably can about the existing surface. If you are uncertain, a small adhesion test or a coating manufacturer’s technical support can be more useful than guessing.
For choosing sheen after the surface is repaired, our interior paint finish guide compares flat, eggshell, satin, and semi-gloss finishes by room and use.
Cause 4: Painting Before the Surface Was Dry
Fresh drywall compound, patched plaster, washed walls, masonry, and repaired water damage all need adequate drying time. Painting too soon can trap moisture or interfere with adhesion.
Drying time is not the same for every house. Temperature, humidity, ventilation, material thickness, and the original moisture source all matter. A patch that feels dry on the surface can still contain moisture below the face.
Do not use paint as a deadline tool. If a leak was repaired yesterday, confirm that the assembly is actually dry before sealing it under primer and finish paint.
Cause 5: Excess Humidity and Condensation
Some peeling occurs without an active plumbing or roof leak. Warm humid indoor air can condense on cold surfaces such as poorly insulated exterior walls, window returns, metal components, or ceiling areas near thermal bridges.
EPA recommends controlling indoor humidity and responding quickly to condensation. If peeling repeatedly appears on the same cold exterior wall, do not assume the paint is defective. Consider ventilation, insulation, air leakage, and indoor humidity as part of the diagnosis.
Bathrooms are a common example. A high-quality moisture-resistant coating can help after the room is properly ventilated, but paint alone cannot compensate for persistent condensation.
Cause 6: Exterior Water and Weathering
Exterior peeling is often more complex because the coating is exposed to rain, sun, temperature swings, wind, and moisture moving from inside the house outward.
Check gutters, downspouts, roof edges, flashing, window trim, siding joints, and horizontal surfaces where water can sit. Wood that stays wet may decay underneath the coating. If you find soft or rotted material, replacing or repairing the substrate comes before repainting.
If you are planning a larger exterior project, our 2026 exterior house painting cost guide explains preparation, labor, access, and repair factors that affect the total scope.
Lead Paint: The Safety Check Before You Sand
This is the point where a routine paint repair can become a health and regulatory issue.
The federal government banned consumer use of lead-based paint in residential settings in 1978, but millions of older homes still contain it. EPA states that deteriorating lead-based paint can create hazardous chips and dust, and renovation activities such as sanding, cutting, scraping, and window work can spread that dust.
If your home was built before 1978 and the paint history is unknown, do not assume that a peeling layer is lead-free just because newer paint is visible on top. Older lead-containing layers may still be underneath.
To find out rather than guess, EPA advises hiring a certified lead-based paint inspector or risk assessor to determine whether the home has lead-based paint, or simply assuming that it does and planning lead-safe work accordingly (EPA: Protect Your Family from Sources of Lead).
For homeowners doing their own work
EPA says the federal Renovation, Repair and Painting rule generally does not apply to an owner working on their own residence, but there are important exceptions, including certain rental, childcare, and house-flipping situations. Even when the federal contractor rule does not apply to your own DIY project, EPA recommends lead-safe work practices.
EPA’s March 2026 lead-safe renovation guidance is a useful current reference. If you are not confident about testing, containment, dust control, cleanup, or the condition of the coating, hiring a lead-safe certified contractor is the safer route.
For hired contractors
For covered pre-1978 housing and child-occupied facilities, EPA’s RRP requirements generally require paid firms performing covered work that disturbs painted surfaces to be certified and to use trained renovators and lead-safe work practices. State-authorized programs may have additional requirements.
Do not dry-sand large areas of unknown old paint, use open-flame methods, or create uncontrolled dust simply because the visible failure looks cosmetic.
When Mold Is Present
Mold changes the sequence of work. EPA’s guidance is straightforward: correct the moisture problem, clean appropriate hard surfaces, dry the area completely, and do not paint over mold.
If porous material such as drywall has been extensively wet or mold-damaged, surface cleaning and repainting may not be enough. The damaged material may need to be removed and replaced after the water source is corrected.
Large mold areas, hidden mold, contaminated HVAC systems, sewage-related water, or occupants with particular health vulnerabilities can justify professional remediation rather than routine painting.
DIY Repair: A Safe Sequence for a Dry, Non-Lead, Limited Area
If the area is small, the substrate is dry and sound, there is no suspected lead hazard, and no structural or mold problem is present, a homeowner repair may be reasonable.
- Fix the cause first. Repair leaks, improve ventilation, or correct the adhesion problem before touching the finish.
- Protect the room. Cover floors and nearby surfaces and control dust.
- Remove only loose coating. Scrape failing paint until you reach sound, firmly bonded edges. Do not gouge the substrate.
- Feather the transition. Smooth the edge between bare and painted areas using a method appropriate for the substrate and paint history.
- Repair the surface. Patch damaged drywall, plaster, or wood as appropriate.
- Clean thoroughly. Remove dust, grease, residue, and repair debris.
- Allow complete drying. Do not rush this step.
- Prime where required. Bare drywall paper, repaired plaster, stained areas, porous patches, wood, or difficult substrates may need a specific primer.
- Apply compatible finish paint. Follow the manufacturer’s coverage, temperature, humidity, and recoat instructions.
- Monitor the repair. If bubbling or peeling returns, investigate the underlying cause again rather than applying another coat.
When Primer Matters
Primer is not automatically required on every repaint, but it is valuable when the repaired surface has uneven porosity, bare patches, stains, repaired drywall compound, tannin-prone wood, or an existing coating that needs improved adhesion.
Water stains require extra judgment. A stain-blocking primer can prevent a dry old stain from bleeding through, but primer does not fix an active leak. If a ceiling stain continues to expand or darken, stop painting and trace the water source.
Do You Need to Remove All the Old Paint?
Usually not. The goal is to remove paint that is no longer bonded while preserving sound layers that remain firmly attached. Stripping an entire wall can create unnecessary labor and, in older homes, unnecessary dust exposure.
However, if failure is widespread across multiple layers, if incompatible coatings are separating throughout the room, or if the substrate itself is damaged, a larger removal and restoration scope may be justified.
Peeling Paint on Drywall
Drywall needs gentle treatment. Aggressive scraping can tear the paper face, and sanding can expose or fuzz the paper. If the face paper is damaged, it often needs to be sealed appropriately before patching and repainting.
If drywall is soft, swollen, sagging, or repeatedly wet, do not treat it as a paint-only repair. Find the moisture source and determine whether the board should be replaced.
Peeling Paint on Plaster
Older plaster walls can fail differently from drywall. Paint may peel because of moisture, old calcimine or distemper coatings, multiple incompatible paint layers, or movement in the plaster itself.
If the plaster sounds hollow, has broad cracks, or is separating from the lath, painting is secondary to stabilizing the substrate. A plaster specialist may be more appropriate than a general paint touch-up.
Peeling Paint on Wood Trim
Wood trim can peel because of poor preparation, moisture, failed caulk, condensation, or repeated expansion and contraction. Windows are especially important because they combine weather exposure, condensation, friction, and—in older homes—potential lead paint.
Do not automatically sand old window paint aggressively. EPA specifically identifies windows and friction surfaces as important lead-dust concerns in older housing.
When to Call a Professional
Professional help becomes more valuable when diagnosis, safety, or the underlying repair is more important than the coating itself.
Consider calling the appropriate professional when:
- The house was built before 1978 and significant paint disturbance is planned.
- Peeling is widespread or affects multiple rooms.
- The surface is repeatedly wet.
- You suspect a roof, plumbing, flashing, or window leak.
- Drywall or wood is soft, rotten, swollen, or structurally damaged.
- Mold is extensive, hidden, or associated with contaminated water.
- The same area has already been repaired and failed again.
- The project requires high ladders, scaffolding, or difficult exterior access.
- You are uncertain whether the coating system is compatible with the substrate.
For larger work, use our contractor hiring guide to compare written scopes, insurance, exclusions, surface preparation, cleanup, and warranty terms.
Questions to Ask a Painter Before Hiring
- What do you believe caused the peeling?
- How will you verify that the surface is dry before repainting?
- Exactly how much loose coating will be removed?
- What cleaning and preparation steps are included?
- What primer, if any, will be used and why?
- How will dust be contained?
- If the home is pre-1978, are you certified for applicable lead-safe work?
- Are repairs to drywall, plaster, caulk, or rotten wood included?
- How many finish coats are included?
- What conditions are excluded from the workmanship warranty?
A low painting quote can become expensive if it assumes the wall is ready for paint when the real job is moisture repair, substrate restoration, or lead-safe preparation.
Common Mistakes That Make Peeling Return
- Painting before a leak is repaired
- Painting over mold
- Skipping cleaning in kitchens and bathrooms
- Painting a glossy surface without proper preparation
- Ignoring failed caulk around windows and trim
- Using the wrong primer or no primer where the substrate requires one
- Applying paint before repairs are dry
- Using bathroom paint as a substitute for ventilation
- Dry-sanding unknown old paint in a pre-1978 home
- Covering soft or damaged drywall instead of replacing it
A Practical Homeowner Diagnosis Checklist
Before you buy paint, write down these answers:
| Question | Why it matters |
|---|---|
| Where exactly is the peeling? | Location can point toward water, humidity, friction, or preparation issues |
| Is the surface dry now? | Active moisture must be solved before coating |
| Does the problem change after rain or showers? | Helps identify environmental triggers |
| Is the substrate firm? | Soft drywall or rotten wood needs repair, not just paint |
| Was the home built before 1978? | Determines whether lead-safe planning should be part of the job |
| Is mold visible? | Moisture and cleanup come before repainting |
| Did a previous repair fail? | Suggests the original cause may still be active |
Bottom Line
Peeling paint is best treated as a diagnostic clue, not a decorating inconvenience. The durable repair starts by asking why the coating lost adhesion.
If the wall is dry, sound, lead-safe to disturb, and the failure is limited to preparation or adhesion, a careful homeowner repair can work well. If moisture, mold, damaged building materials, recurring failure, or possible lead paint is involved, the correct sequence changes: control the hazard or repair the building problem first, then restore the finish.
The difference between a patch that lasts six months and a repair that lasts years is usually not the brand of paint. It is whether the cause was correctly identified before the first scraper or brush touched the wall.
Home Cost Desk compares current U.S. cost or technical references and checks safety, code, efficiency, incentive, or regulatory claims against authoritative sources when available. National figures are planning ranges, not local quotes.
Editorial review: Home Cost Desk Editorial Team · Read our research methodology · Detailed sources appear below.
Sources and Methodology
This guide uses current U.S. Environmental Protection Agency guidance for lead-safe renovation and moisture/mold control. The EPA lead-safe renovation pages cited below were last updated between May and August 2026 (checked October 29, 2026). The article distinguishes general homeowner maintenance from regulated contractor work and avoids presenting paint appearance alone as proof of lead, mold, or structural damage.
- U.S. EPA: Renovation, Repair and Painting Program for Consumers
- U.S. EPA: Steps to Lead-Safe Renovation, Repair and Painting
- U.S. EPA: Lead-Safe Renovations for DIYers
- U.S. EPA: A Brief Guide to Mold, Moisture and Your Home
- U.S. EPA: Basic Mold Cleanup Steps
Featured photo: Jem S via Unsplash.