Quick Answer
A complete crawl space encapsulation commonly costs about $1,500 to $15,000 nationally, with a midpoint around $5,500 in This Old House data. Angi places many professional projects in the $5,000 to $15,000 range. Size matters, but existing moisture, mold or pest damage, drainage, insulation, dehumidification and access can move the price more than square footage alone.
Home Cost Desk uses national cost data as planning guidance rather than a substitute for a local written bid. Actual prices vary with city, labor market, product availability, building age, access, code requirements and concealed damage.
2026 Cost Snapshot
| Scope | 2026 planning benchmark | Basis |
|---|---|---|
| Basic/limited encapsulation | About $3–$7 per sq. ft. | This Old House |
| Complex moisture-control scope | Up to about $10 per sq. ft. | This Old House |
| Typical complete project | $1,500–$15,000; around $5,500 average | This Old House |
| Professional project benchmark | $5,000–$15,000 | Angi |
How to Read the Price Range
The low end of the range, around $3 to $7 per square foot in This Old House’s figures, usually describes a dry, accessible crawl space that needs a liner and basic sealing. Projects move toward $10 per square foot and the upper end of the $1,500–$15,000 range when the crawl space is low or cramped, has standing water, needs drainage or a sump, or requires old insulation, debris or damaged wood to be removed first. The size of the crawl space matters, but the moisture problem you are solving usually matters more.
What Drives the Cost
The largest cost drivers for this project include crawl-space square footage and working height, condition of joists, piers and subfloor, vapor-barrier thickness and wall coverage, drainage or sump-pump work, dehumidifier and electrical needs, old insulation removal and replacement, mold, pest or wood-damage remediation, and permit and inspection requirements.
Hidden Costs to Budget For
Build a contingency for conditions that cannot be fully confirmed until work begins. Common examples include mold or pest cleanup before sealing, standing-water correction, grading or drainage, sump pump and discharge routing, electrical outlet for a dehumidifier, damaged insulation or duct repair, and termite inspection requirements in some regions.
Safety, Permits and Quality Control
Encapsulation should not hide an active water source or structural problem. Diagnose plumbing leaks, exterior drainage, groundwater and wood decay first. Moisture control also needs to be coordinated with local termite-inspection practices and code requirements.
Two agency points shape a crawl space decision. The U.S. EPA says the key to mold control is moisture control and recommends keeping indoor relative humidity below 60 percent, ideally 30 to 50 percent, when possible (see EPA’s mold and moisture guide). EPA also lists radon among the leading causes of lung cancer, so if the crawl space connects to living space, ask whether a radon test makes sense before sealing it and whether the proposed liner and sealing details would work with a mitigation system later (EPA radon health risk).
Permit rules vary by jurisdiction. The contractor should state whether a permit is required and who will obtain it. For work involving structure, plumbing, electrical systems, combustion equipment, waterproofing or the weather envelope, quality control belongs in the scope from the beginning.
Three Real-World Planning Scenarios
Scenario 1: Dry but humid crawl space
A sound 1,000-square-foot crawl space with no standing water may need a heavy vapor barrier, sealed penetrations, wall treatment and controlled dehumidification. This is the sort of project that can stay near the middle of national ranges.
Scenario 2: Standing water after storms
Encapsulation alone is not the first move. Drainage, a sump system, grading or exterior water management may be necessary before the space is sealed.
Scenario 3: Mold and damaged insulation
Removal, cleanup and replacement work can materially increase the price. The quote should separate remediation from the encapsulation package.
How to Compare Contractor Quotes
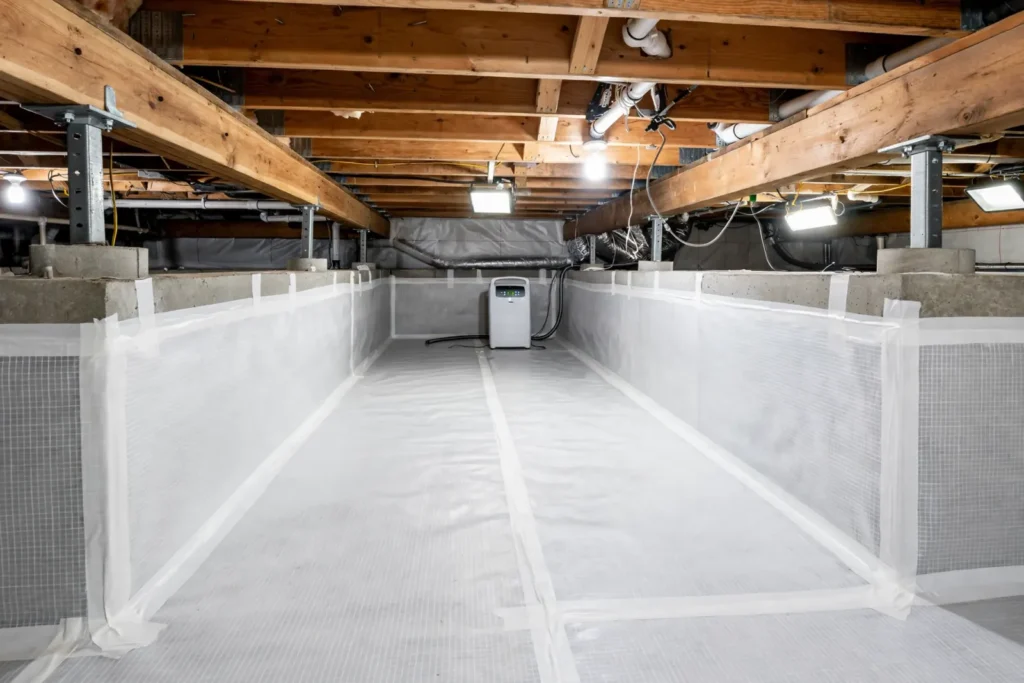
Encapsulation bids often use the same word for very different systems. Line the bids up on liner thickness and how far it runs up the walls, whether seams and piers are sealed, whether vents and the rim joist are closed off, how the space will be dried (dehumidifier, conditioned supply air or neither), and whether drainage or a sump is included. A cheaper bid that skips drying or water management is not the same product.
DIY vs. Professional Work
DIY can make sense when the task is genuinely low-risk, the homeowner understands the assembly, and a mistake will be obvious and easy to correct. Professional help becomes more valuable when the work can cause water damage, fire, structural movement, gas or electrical hazards, roof leaks, failed waterproofing, expensive finish damage or warranty problems.
Include tool rental, disposal, material waste, time and the cost of correcting an error in the DIY decision. The cheapest-looking path is not always the lowest total-cost path.
How to Save Money Without Creating a False Economy
The safest way to reduce crawl space encapsulation cost is to define the moisture-control scope before comparing bids. Measure the crawl space, identify the water source, document joist and subfloor condition, and ask for separate prices for the vapor barrier, wall coverage, drainage or sump work, insulation, remediation and dehumidification. A low base price is not a bargain if those necessary components appear later as change orders.
Pre-Quote Homeowner Inspection
- Look for standing water, wet soil, efflorescence or a musty smell after heavy rain, and photograph where it appears.
- Note whether ductwork, a furnace or a water heater sits in the crawl space; that changes how the space should be conditioned.
- Check the outside grade and downspouts on the same walls where you see moisture inside.
- Record any visible wood rot, sagging joists or pest damage so contractors price structural repair separately.
- Photograph standing water, damp soil, wet insulation, visible wood damage, piers, joists and the lowest-clearance areas before work begins.
- Ask which moisture, pest or wood-damage conditions can be confirmed during the estimate and which may only become clear after insulation or debris is removed.
Red Flags in a Quote
- A liner-only price with no plan for where liquid water goes.
- No mention of how humidity will be controlled after the vents are sealed.
- Sealing vents around fuel-burning equipment without discussing combustion air.
- No plan for likely concealed conditions such as mold or pest cleanup before sealing, standing-water correction, grading or drainage, sump pump and discharge routing, electrical outlet for a dehumidifier.
Planning the Work From Start to Finish
Schedule drainage or grading fixes before the liner goes down; a liner over an active leak traps water instead of solving it. Ask whether wet or damaged insulation will be removed and how debris leaves the crawl space.
After the work, keep a hygrometer reading log for the first season. If humidity stays high, ask the installer to check the dehumidifier sizing, drain line and air sealing before adding more equipment.
Quote Checklist
- Liner thickness, coverage (floor only or up the walls) and seam and pier sealing.
- Vent and rim-joist sealing method.
- Drying method: dehumidifier model and drain path, or conditioned air.
- Drainage, sump pump and discharge location if water enters.
- Removal of old insulation and debris, plus any wood repair allowance.
- Demolition, removal and disposal.
Simple Crawl Space Decision Path
- Standing water or active leak? Fix drainage, plumbing or groundwater control first.
- Wood damage, pests or mold-like growth? Diagnose and remediate before sealing the evidence behind a liner.
- Dry structure but high humidity? Price a sealed vapor-control system and a defined humidity-control plan.
- Quote includes only ground plastic? Compare it carefully with full encapsulation; wall coverage, seams, penetrations, access door and dehumidification may be separate.
- Termite inspections are required locally? Preserve the inspection gap or access detail required by local practice before the liner is installed.
Questions to Ask the Encapsulation Contractor
- What moisture source are you solving, and how did you confirm it?
- What vapor-barrier thickness and wall coverage are included in the base price?
- Are drainage, sump work, mold or pest remediation and insulation priced separately?
- How will humidity be controlled after the crawl space is sealed?
- How will the installation preserve required termite inspection access and future service access?
Related Home Cost Desk Guides
Frequently Asked Questions
Is encapsulation the same as laying a vapor barrier on the ground?
No. A basic ground vapor barrier may cover soil only. A full encapsulation usually involves sealing the ground, walls, seams and penetrations as a coordinated moisture-control system, often with controlled dehumidification and drainage as needed.
Do I need a dehumidifier after encapsulation?
Not every crawl space is identical, but many sealed crawl spaces need a planned humidity-control strategy. The contractor should explain how humidity will be controlled after outside ventilation is reduced or closed.
Can encapsulation fix standing water?
It should not be used to hide standing water. Groundwater, grading, downspout discharge, plumbing leaks or drainage problems should be corrected before or as part of the encapsulation scope.
Should old insulation be removed?
Wet, contaminated or damaged insulation usually needs attention before the space is sealed. Sound insulation may sometimes remain depending on the design, but the contractor should explain the thermal and moisture strategy rather than automatically adding new material over a problem.
What if there is mold or pest damage?
Remediation and pest correction should be separated from the encapsulation price so the homeowner can see what is being cleaned, removed or repaired before the area is covered.
Will encapsulation interfere with termite inspections?
It can if wall coverage hides required inspection areas. Coordinate the barrier detail with local pest-control practices and code requirements so future termite inspection access is preserved.
Before You Encapsulate: 5 Checks
- Identify the moisture source: plumbing leak, groundwater, poor grading, humid outdoor air or more than one cause.
- Document standing water, mold-like growth, pest activity, wood damage and wet insulation before anything is covered.
- Ask the contractor to separate drainage, remediation, insulation and dehumidification from the base encapsulation price.
- Confirm vapor-barrier thickness, wall coverage, seam treatment, penetrations, access-door sealing and dehumidifier drainage.
- Make sure the finished system still allows required termite inspection access and complies with local code and pest-control practices.
What to Do Next
Local examples: See how climate and local conditions change the scope in our Nashville crawl space encapsulation cost guide and our Seattle crawl space encapsulation cost guide.
Bottom Line
A complete crawl space encapsulation commonly costs about $1,500 to $15,000 nationally, with a midpoint around $5,500 in This Old House data. Angi places many professional projects in the $5,000 to $15,000 range. Size matters, but existing moisture, mold or pest damage, drainage, insulation, dehumidification and access can move the price more than square footage alone. The strongest decision is based on the real project scope, a normalized written quote and clear responsibility for preparation, hidden conditions and finish work.
Sources & Methodology
Home Cost Desk reviewed the following sources for national planning ranges and technical guidance. Cost data is not a substitute for local bids. Where safety, energy, moisture or building-envelope issues are involved, authoritative agency guidance should take priority over marketing claims.